 Nederlands
 English
Manage assortment
Introduction
This document describes the process of adding information concerning the products a user can order in a customer environment.
To begin please log into a customer environment as supplier administrator: http://supplier.ecmanage.co.uk/customer
Once again, “supplier” is your environment in Ecmanage. “Customer” is the company code as entered when creating the customer environment.
You will then find the log-in screen of the customer environment. Log in here with a user who has the authority to manage products and sizes. Initially this is only the supplier admin role.
In Ecmanage the assortment is managed at 3 levels: Product groups, products and sizes. The setup of this base data is important for the information shown in an order screen:
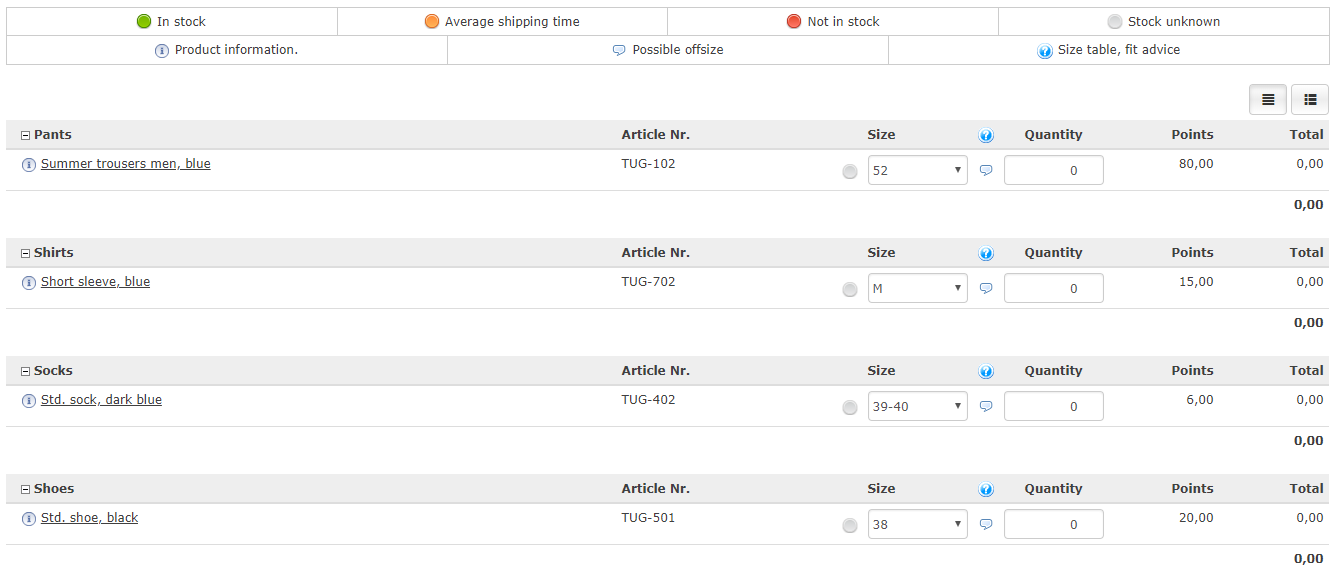
1. Product groups
With this option the product groups can be created and changed. Product groups are used to organize the list of products in the order screen. In the picture above you can see how the groups are used to organize the products.
Go to the main menu Maintenance >> Product assortment >> Productgroups to manage product groups:

In order to create a new group please provide relevant information in the fields and then press “Save”. When you click on an existing group in the tree on the left, a can change a product group. You can click on “Cancel” at any time to return to a blank form. There a product group can be added.
- <Language>
The language in which the name and description must be entered. When creating a new product group please select a language first. Once a group has been created you can add other languages. When a user changes his diplay language, the product group name and description are shown in the chosen language. If no name or description is entered for that language, the system will fall back on a language that is present.
- <Name>
Name of the product group. This is shown in the order screen.
- <Description>
Any additional information about the product group.
- <Image>
An image is optional and not used in the order screen. There is an Ecmanage module for product browsing. This module can be used to browse through the product group structure.
- <Measure instruction>
You can upload a document for measurement instruction here.
- <Sort Order>
Product groups are shown in alphabetical order by default in the order screen. By entering a number here the sort order can be influenced.
- <External Id >
A unique code for the product group. This Id can be used to link a product to a product group. This Id must not contain any alternate characters such as an ampersant (&).
- <Parent>
By choosing a parent product group here, a hierarchical structure can be created. This is only informative and is not shown in the system. You can use the External Id of the parent product group.
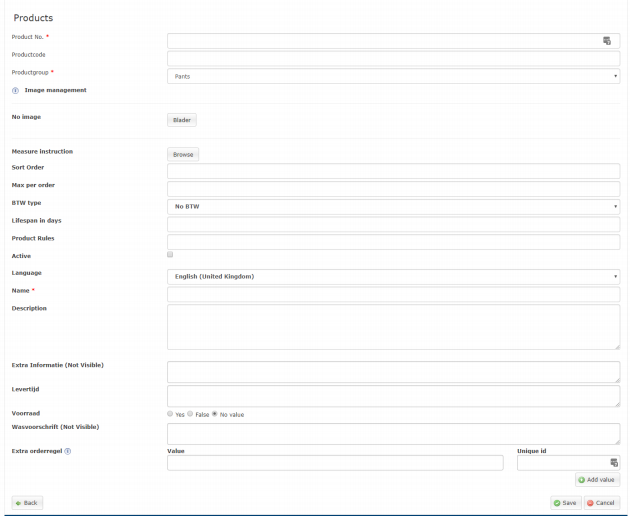
2. Products
With this option products can be created and changed. In this form you can define basic product information. The specific sizes and prices will be added in the next form: Sizes. Please define all products that can be ordered by users.
Go to the main menu Maintenance >> Product assortment >> Products to manage products :
Via the ‘magnifying glass’ an existing product can be viewed and changed.
By checking the checkbox in the column, all products will be selected. After selecting the “Remove image?” and clik on the button “Save”, the images of the selected products are deleted.
By clicking on the button “New product” a new product can be created.
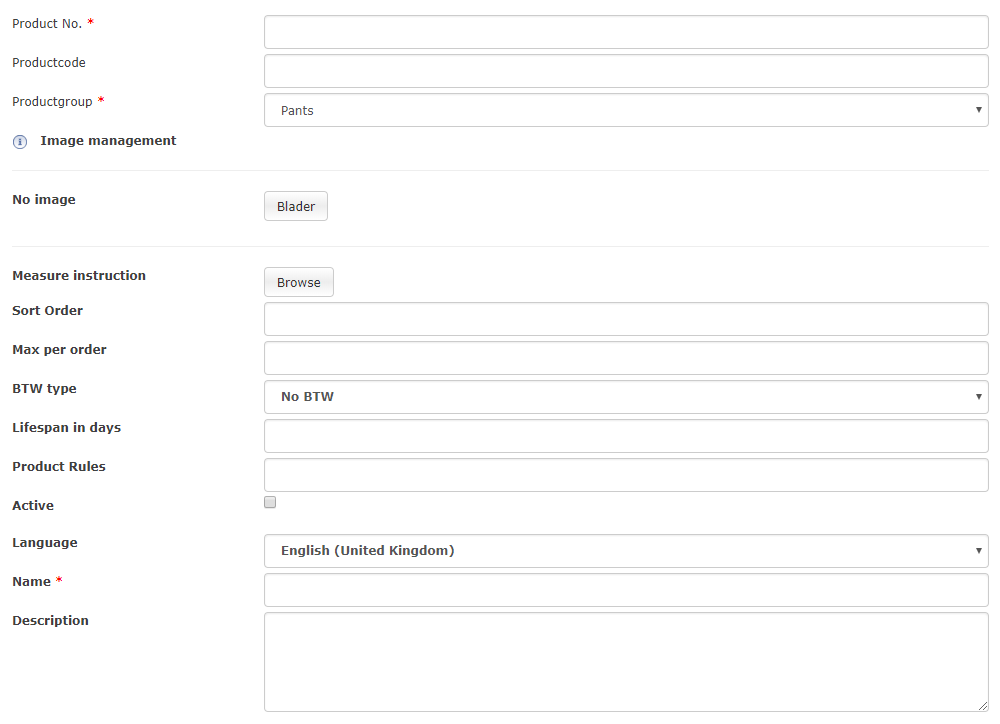
<Product No.> Unique Number for this product. This field is displayed in the order screen.
<Productcode> Optional field. This can be an external identification for a product.
<Product group> The link to a product group.
<Image management> From the orderscreen it is possible to access detailed product information. The image of a product can be added as a reference. The image has a maximum width of 265 pixels. If you provide images with a larger size they will automatiaclly be scaled down.
Useing the “Browse” button you can add one or more images. The image filename can have additional usage: 1. Please use the product no. as a filename, for example SHIRT001.png If the image filename does not start with the product no. the system will change the filename. 2. When there are more images please add a sequence number:_{sequence} eg. SHIRT001_1.png 3. Optional: when you have a normal and a large image with high resolution please add _L to the filename of the large image. e.g. SHIRT001_L.png, SHIRT001_1_L.png 4. Optional: if you also upload a thumbnail image please add _T. eg. SHIRT001_T.png 5. Valid extensions: .jpg, .png
You can remove an image using the checkbox and selecting the “Save” button.
<Measure instruction> Please add an optional document using the “Browse” button. This document can be product specific measure instructions or thechnical details. This document is only visible in the ordering screen when the setting with module =”ORDERSCREEN” and switch =”Display the link to download the measurement instructions pdf ?” is enabled.
<Sort order> An optional field to influence the sortorder. By default the orderscreen will use the product name as a sort order. When you whish to alter the sort order please provide a number in the sort order field.
<Max per order> You can limit the amount of items which can be ordered at the same time. It is however possible to place more than one order for the same product.
<Lifespan in days> When the optional module for signaling is enabled you can define after how many days after the order an item is flagged as in need of replacement or in need of inspection.
<Product Rules> There is an option to define size modification for specific products. These so called parameters are provided in this field using a semicolon sperated list. size modufication can be used for lengthening the sleeve or provide name tag details or selecting with or without logo.
<Name> The name of the product, as displayed in the orderscreen.
<Description> Additional information for the product. This information is shown in the product details pop up screen.
The product no. needs to be a unique code for a product. Some ERP systems have a unique product no for each size and do not specify a unique code for the overall product. In this case please provide a generic code for the product and specify the ERP product no at the assortment level.
When the product details are reviewed or modified you can see a link at the top right of the screen. This indicates: “This product has x active measures.” By selecting this link you will be redirected to the respective screen for manageing the inventory and price for this product.
3. Sizes: Product inventory and price
Using this screen you can manage the product sizes. You can also define the inventory and price details for each size.
Please select Maintenance >> Product assortiment >> Product inventory and price :
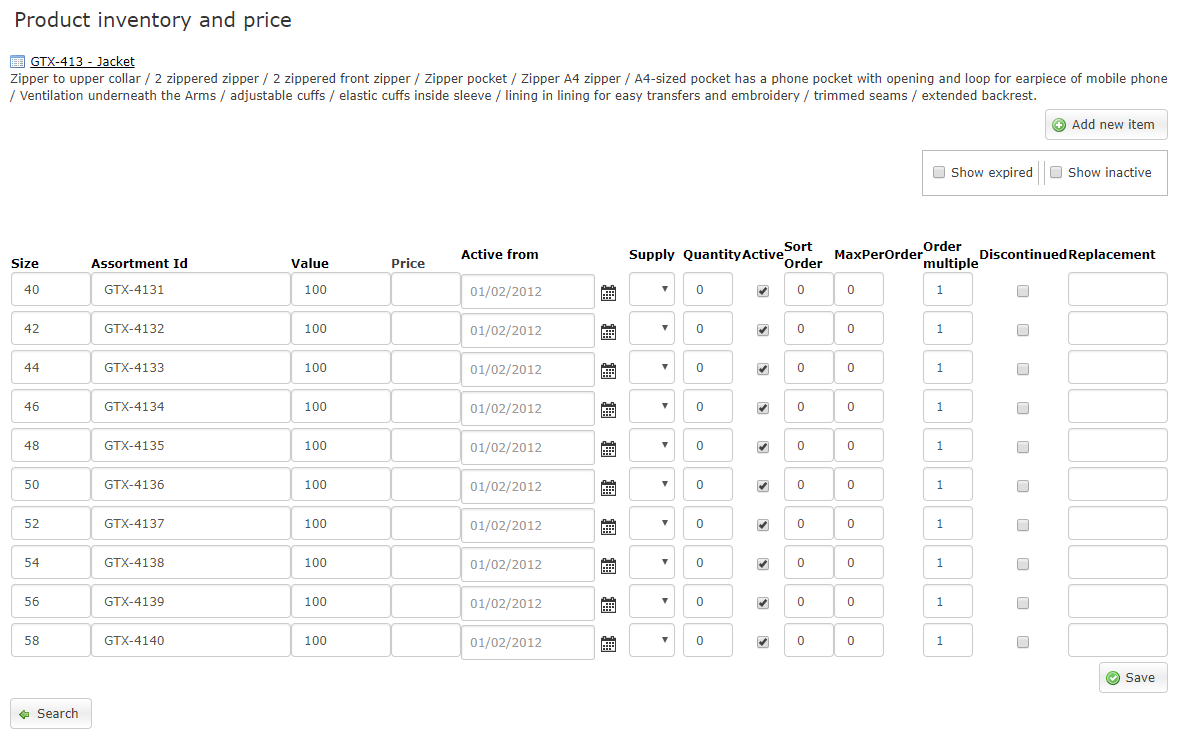
Using the option “Add new item” you can add new sizes. Use the “Save” to save any modification made in the screen.
When you select the product no at the top you will be redirected to the product manage screen.
<Size> This is the size as it is visible in the orderscreen.
<Assortment Id> This is a unique assortment no for each size of a product. We advise to use the same identication as you have within your ERP system. Often we find that the product has a generic code and that the specific size for a product has an assortment no whene product and size are concatenated. For example the product is “SHIRT-101” and the size is “46” then the assortment no is “SHIRT-10146”.
<Value> This is the price for the item as displayed in the orderscreen. This can be a monetary value or a generic budget value.
<Price> This is an optional field that is not displayed during the ordering process. It can be usefull for the integration with ERP.
<Active from> The date at which this size can be ordered.
<Supply> This is an indication of the supply leadtime. We use this for a green yellow and red indication in the orderscreen.
<Quantity> When the inventory module is enabled you can see or modify what is on the shelf.
<Active> Determines in combination with the Active from date if the item is visible in the orderscreen. When active you can order the item. When there are no sizes active for a certain product at the time of ordering then the product is not displayed in the orderscreen.
<Sort Order> Just like the products the sizes can also be ordered using this optional sort order field. The default sort order is based on the alfabetical order of the size.
<Max per order> Identical to the field at the product level, this value has precedence over the product max per order.
<Order multiple> Please specify in what multiple the item needs to be ordered.
<Discontinued> When you would like to end a product when the inventory is zero please use this indication.
<Replacement> This is the new assortment no of a product that is shown as an alternative when there is no inventory left.
By default the product inventory and price screen only shows items that are active. Please use the option “Show expired” to display all items without respect to Active from. Use “Show inactive” to display all items.
How to find your Assortment items in the orderscreen
After you have defined your product groups, your products and the sizes the assortment still does now show up in the orderscreen. This is because we need to define who can order products. The exception to the rule are the bulkorders.
Using bulkorders, sometimes called department orders, you can select a product from the entire list as long as the product is active. We do have the option to define specific bulk set to limit the items a department can order.
When you order for a person (using “For myself” or “For another person”) you can only select product from the list of products that are allowed for the person who is linked to the order. This linking of products can either be done using “Normal set”, or using “Personal set”.
You can find more detailed information on linking products to persons in the manual Manage sets
For more information concerning personal sets please see Custom-products